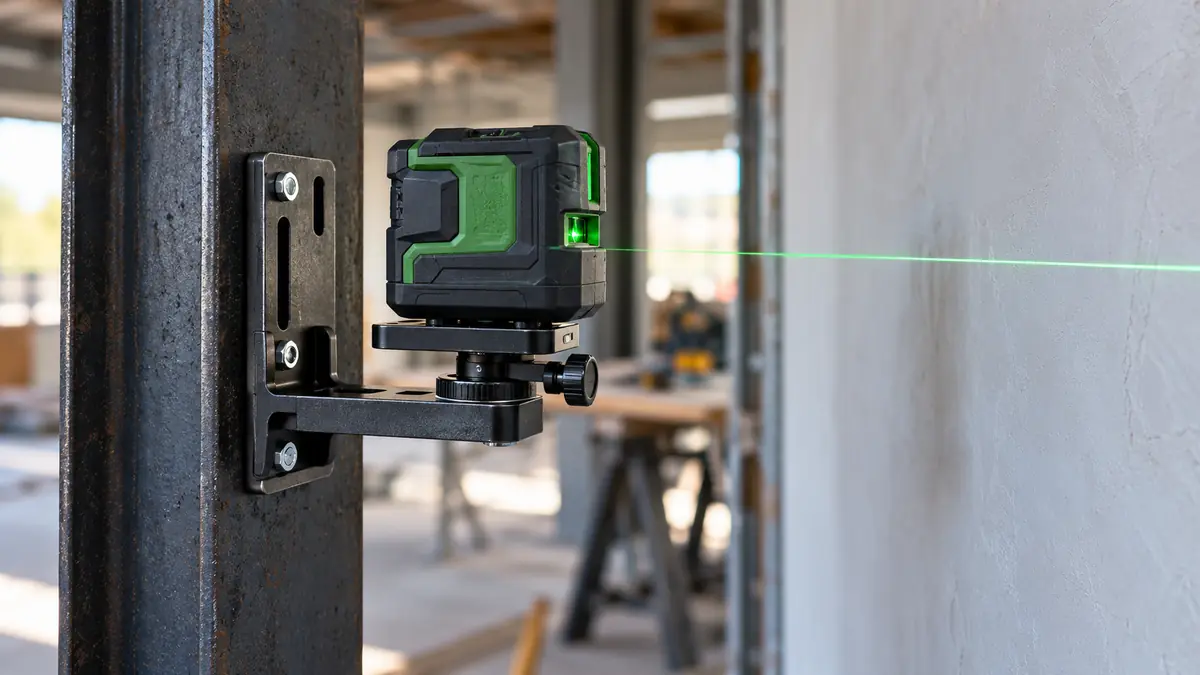
The line is a fraction below your mark. You loosen the mount, move it, tighten it, and now it sits a fraction above. A good laser wall mount earns its place in exactly that small, irritating gap between a rough position and the reference you actually need. The best laser level wall mount holds the instrument securely on a suitable surface while leaving enough adjustment to place the reference correctly.
Height, rotation, depth, and sideways adjustment solve different problems. A fine-rotation knob will not raise a horizontal line, and an underside tripod thread is not necessarily the connection that accepts the laser itself. Those distinctions matter more than a broad universal claim.
These nine independently available mounts cover compact magnetic brackets, ceiling-edge arrangements, and model-specific rotating systems. Choose the required movement and attachment surface first. Then confirm that the instrument fits securely, with its beam windows and controls accessible at the intended height.
Quick Answer
- Best Overall: Bosch BM1. Magnetic wall/ceiling positioning device.
- Best Straightforward Fine-Height Bracket: Huepar PV12. Fine-height magnetic L bracket.
- Best Multi-Directional Adjustment: ENVENTOR Fine-Adjustment Mount. Multi-direction magnetic bracket with back clip.
Comparison Table
| Product | Best fit | Support design | Connection and positioning |
|---|---|---|---|
| Bosch BM1 | Best Overall | Magnetic wall/ceiling positioning device | Laser connection and 1/4-20 / 5/8-11 support interfaces |
| Huepar PV12 | Best Straightforward Fine-Height Bracket | Fine-height magnetic L bracket | 1/4-20 male tool connection; two underside support threads |
| ENVENTOR Fine-Adjustment Mount | Best Multi-Directional Adjustment | Multi-direction magnetic bracket with back clip | 1/4-20 tool screw; 1/4-20 and 5/8-11 support threads |
| Milwaukee 48-35-1311 | Best for Milwaukee Line and Plane Tools | Magnetic multi-plane rotating bracket | For Milwaukee cross-line and plane lasers |
| Firecore FLM60A | Best Compact Height-Adjustment Option | Compact magnetic height-adjustment bracket | 1/4-20 tool connection; 5/8-11 support connection |
| Bosch WM4 | Best Sliding Wall Platform | Wall and ceiling-trim mounting platform | 5/8-11 tool thread; clip or keyhole fixing |
| Bosch RM10 | Best Fine Rotation for Supported Bosch Models | Magnetic rotating slide-in mount | Compatible Bosch slide housing; optional DK10 ceiling clip |
| Leica Lino UAL130 | Best for the Specified Leica Lino Setup | Adjustable wall bracket with quick clamp | For the specified Leica Lino mounting arrangement |
| Huepar L-Shaped Magnetic Adapter | Best Simple Pivoting Adapter | Compact pivoting magnetic L bracket | 1/4-20 male tool screw; 5/8-11 female support thread |
1. Bosch BM1 (Best Overall)

A horizontal line can be almost right and still take several frustrating moves to place. The BM1 gives that final correction its own control. For a cabinet-height reference, the useful movement happens on the bracket while its attachment remains established, rather than by sliding the entire assembly again.
The BM1 combines microfine height adjustment with a locking control and magnetic attachment. Retractable feet allow tabletop positioning, while the selected package includes a clip for suitable ceiling-grid attachment. The underside provides 1/4-20 and 5/8-11 support connections; check the instrument connection and clearance for the exact laser. The retractable feet give it another role on a stable horizontal surface, while the ceiling clip adds a separate overhead option. That combination is appealing when your next room offers a different support. Check the actual instrument connection, because the two underside threads describe support interfaces rather than universal tool compatibility.
Pros
- Microfine height control.
- Height lock.
- Magnetic attachment.
- Retractable feet.
- Ceiling clip in the selected package.
Cons
- Ceiling clip needs a suitable supporting edge.
- Thread compatibility does not establish capacity for every instrument.
Cabinet installers and anyone repeating wall-height marks have the clearest reason to keep a BM1 in the kit: the bracket can stay attached while the reference moves into place. The retractable feet and ceiling clip give it other useful positions, but height control is the feature doing the everyday work. Someone mainly correcting the direction of a vertical line should look more closely at the RM10. These are different adjustments, and buying the one you actually need is what makes the mounting system feel purposeful.
To buy this product, click here.
2. Huepar PV12 (Best Straightforward Fine-Height Bracket)

A small wall laser often needs height correction more than a large positioning system. The PV12 concentrates on that job with separate adjustment and locking controls. Beside a shelf mark, its appeal is keeping the broad attachment position while bringing the reference to the intended height.
The PV12 has separate controls for height adjustment and locking, plus horizontal base rotation. The instrument connects through a 1/4-20 male thread, with 1/4-20 and 5/8-11 female support threads underneath. Magnets and a screw-hanging hole offer different attachment routes; the selected package contains the bracket and manual rather than a laser. For a shelf baseline, the useful advantage is keeping the broad mounting position while correcting the beam height. For a tripod setup, the underside connections offer another route. Neither removes the need to check body clearance, especially when a low projection window sits close to the platform.
Pros
- Fine height adjustment.
- Separate height lock.
- Horizontal rotation.
- Magnetic or screw-hole attachment.
- Two underside support interfaces.
Cons
- No auxiliary ceiling clamp identified in this package.
- Tool body clearance must suit the bracket.
A compact laser, a suitable steel support, and a horizontal line that needs a small correction are a convincing match for the PV12. It supplies the useful height movement without requiring a large positioning assembly. The ENVENTOR is more interesting when the body also needs to move sideways or away from the wall. For a shelf baseline where those extra movements would stay untouched, the PV12 keeps the adjustment concentrated on the part of the setup that was frustrating in the first place.
To buy this product, click here.
3. ENVENTOR Fine-Adjustment Mount (Best Multi-Directional Adjustment)

A body too close to the wall may need depth adjustment before a height knob is much help. ENVENTOR provides separate movements for those different problems. That makes it interesting for awkward positioning, where repeatedly detaching a simple bracket would interrupt the layout.
This ENVENTOR mount provides separate position controls for height, lateral movement, depth, and rotation. The selected package includes an auxiliary back clip; the listing identifies an opening for objects up to approximately two inches thick. Magnetic attachment, screw holes, and a binding slot offer different supported fixing routes, with a 1/4-20 tool connection. The auxiliary clip adds an attachment option where a suitable edge exists, and the magnetic route remains available on steel. This is most useful for someone who actually needs the extra movements. Each additional knob should be secured before the reference is treated as settled, particularly with the instrument above shoulder height.
Pros
- Fine adjustment in several directions.
- Height locking control.
- Auxiliary back clip included.
- Magnetic attachment.
- Two underside support threads.
Cons
- More knobs to secure before use.
- Clip capacity and beam clearance must match the installation.
This bracket earns its complexity in awkward mounting positions. A laser that sits too close to the wall may need depth adjustment before its height control becomes useful, and that is where ENVENTOR’s separate movements make sense together. A simpler PV12 or FLM60A is a closer match for routine height corrections alone. With the ENVENTOR, the extra knobs are worthwhile when they replace repeated remounting, provided every control can be reached and secured with the actual instrument attached.
To buy this product, click here.
4. Milwaukee 48-35-1311 (Best for Milwaukee Line and Plane Tools)

A compatible Milwaukee line or plane laser gives this bracket a defined starting point. Its fine vertical control can bring a horizontal reference onto a ceiling or fixture datum, while multi-plane rotation offers another option when the support faces an inconvenient direction.
The 48-35-1311 combines multi-plane rotational adjustment with fine vertical positioning and a lock. Magnetic attachment, screw/nail holes, and non-marring pads support different suitable mounting surfaces. Milwaukee identifies its cross-line and plane families for this bracket, with 1/4-20 and 5/8-11 support interfaces. The magnets and hanging holes give different mounting routes, while the contact pads help at suitable surfaces. That does not make every wall a magnetic support or every Milwaukee laser a compatible tool. Its role belongs to the documented line-and-plane family, rather than the large M18 rotary mounting arrangement.
Pros
- Fine vertical positioning.
- Adjustment lock.
- Multi-plane rotation.
- Magnetic and hanging attachment.
- Non-marring contact pads.
Cons
- Confirm the exact Milwaukee instrument fit.
- Not the wall mount for every M18 rotary system.
For an existing Milwaukee line or plane tool, this is a more coherent purchase than selecting a generic bracket by thread size alone. The fine vertical control and adjustment lock address repeated height-setting work, while the rotating arrangement gives the instrument options on less conveniently oriented supports. Its appeal is strongest when that tool compatibility and those movements are used regularly. A large M18 rotary instrument belongs to a different mounting decision, so keep the exact laser family at the center of this choice.
To buy this product, click here.
5. Firecore FLM60A (Best Compact Height-Adjustment Option)

The FLM60A focuses on a common correction without building a large multi-axis assembly around it. Its compact bracket provides fine height movement and locking for a suitable local laser. That is useful beside a wall mark where lateral travel would add little to the setup.
The FLM60A supplies microfine height adjustment and a locking arrangement in a compact bracket. Its upper connection is 1/4-20 and its support connection is 5/8-11. Magnetic attachment and a top hole for suitable screws or nails provide alternative positions without turning the bracket into a universal load-rated support. A suitable screw or nail can provide a hanging point when steel is absent, while the magnetic route is convenient beside metal framing. Plan that fixing before starting. The bracket’s small size should be compared with the laser body and window positions, rather than taken as proof that every small instrument will clear it.
Pros
- Microfine height adjustment.
- Height lock.
- Magnetic fixing.
- Screw or nail hanging hole.
- Compact bracket format.
Cons
- No auxiliary ceiling clip identified.
- No listed lateral or depth micro-adjustment.
The FLM60A makes sense for a compact tool that regularly needs a little height correction but rarely needs sideways travel. Its smaller arrangement can be easier to accommodate beside a local wall task than a multi-axis assembly. ENVENTOR offers more positioning freedom; Firecore concentrates on the useful elevator movement and attachment routes. For a buyer whose normal routine is mount, bring the line to the mark, and lock it, that focused design has a clear place in the bag.
To buy this product, click here.
6. Bosch WM4 (Best Sliding Wall Platform)

The WM4 is a wall platform rather than a little magnetic shelf. Its sliding travel suits a compatible instrument that needs a broader height change while the fixing stays established. That gives the platform a purpose in repeated reference work, especially with the appropriate larger tool.
The WM4 uses a 5/8-11 instrument connection and a vertical sliding platform with a lock. It provides approximately six inches of height adjustment and can attach to suitable ceiling trim with its clip and clamp screw. Keyhole slots provide a wall-fixing route; Bosch identifies supported tools including the GRL300HV and GLL2-80 families. The 5/8-11 tool connection is important: a small 1/4-20 laser does not attach directly merely because both are laser accessories. The wall keyhole route also needs suitable fasteners and a sound substrate. Choose the platform for the actual supported instrument and fixing method, particularly with a larger rotary body.
Pros
- Six-inch sliding adjustment.
- Height lock.
- 5/8-11 tool connection.
- Ceiling-trim clamp arrangement.
- Wall keyhole fixing slots.
Cons
- Not a direct 1/4-20 laser connection.
- Wall fixing requires suitable fasteners and substrate.
The WM4 belongs with buyers who need a proper sliding wall platform for a supported instrument, particularly where a broader vertical adjustment is useful. It is a different proposition from hanging a little cross-line laser on a magnetic L bracket. The 5/8-11 connection and actual wall fixing must suit the tool, but the reward is a reference height that can change without rebuilding that fixing. Small 1/4-20 instruments may be better served by one of the more compact brackets in this selection.
To buy this product, click here.
7. Bosch RM10 (Best Fine Rotation for Supported Bosch Models)

The RM10 addresses direction rather than elevation. With a supported Bosch housing, its fine rotational control can orient a vertical line while keeping the mounting relationship to the plumb reference. That is useful for a track baseline where a small turn matters.
The RM10 uses a slide-in connection for specified Bosch laser housings, including the GCL100-40G and GLL100-40G. A microfine rotation knob orients the vertical reference while the mount rotates around the plumb relationship. Magnetic attachment is built in, but height adjustment is not a listed function; the DK10 ceiling clip is an optional accessory. That makes it a different purchase from the BM1, even though both use magnets and carry Bosch branding. Height adjustment is not its listed function, and a standard threaded hole on another laser does not replace the required slide housing. The optional DK10 clip is another separate compatibility decision.
Pros
- Fine rotational control.
- Magnetic attachment.
- Slide-in tool connection.
- Rotation around the plumb reference.
- Optional DK10 ceiling attachment.
Cons
- Requires a compatible Bosch slide housing.
- No fine height adjustment.
The RM10 is worth considering when the plumb relationship should stay established while the vertical line changes direction. That is a specific and useful job, especially with a supported slide-in Bosch tool. It will disappoint a buyer expecting the height-control behavior of the BM1, because the fine knob serves rotation instead. With the correct housing and a layout that needs that movement, however, its specialized connection becomes the reason to buy it rather than a limitation to work around.
To buy this product, click here.
8. Leica Lino UAL130 (Best for the Specified Leica Lino Setup)

For a supported Lino used at several wall-reference heights, the UAL130 makes the adjustment part of a coordinated mounting system. The fine knob provides controlled vertical travel, while the clamp offers a different attachment route from relying on a convenient patch of steel.
The UAL130 provides roughly five inches of vertical adjustment through a fine-adjustment knob. Its quick clamp offers an attachment route to suitable edges and supports. Leica identifies the Lino L2, L2G, L2P5, L2P5G, P5, and L4P1 among the supported tools; confirm the required Lino adapter arrangement rather than assuming a generic threaded fit. The important purchase check is the complete Lino mounting arrangement, including the appropriate adapter for the instrument. A model-specific bracket can be the right choice precisely because the parts work together, but that benefit should not be stretched into a generic fit claim for unrelated tools or unknown laser bodies.
Pros
- Fine vertical adjustment.
- Approximately five-inch travel.
- Quick clamp.
- Specified Leica Lino compatibility.
- Useful wall-positioning format.
Cons
- Check the Lino adapter required for the exact tool.
- Not a universal cross-brand mount.
An established Lino setup gives the UAL130 its strongest case. The vertical travel and clamp can make repeated wall-reference changes manageable without replacing the instrument’s familiar mounting arrangement. The purchase needs to include the correct adapter relationship, not merely a bracket whose photograph looks compatible. For a supported Lino used regularly at different heights, that coordinated system is appealing. For an unrelated laser or a one-off magnetic attachment, the more general threaded brackets here deserve the closer look.
To buy this product, click here.
9. Huepar L-Shaped Magnetic Adapter (Best Simple Pivoting Adapter)

Sometimes the support already establishes a useful height and the missing part is simply a compact attachment. This Huepar L adapter serves that role with magnets, hanging options, and angle adjustment. It is the simpler comparison to make before deciding that a fine-height mechanism is necessary.
This Huepar adapter uses two magnets, hanging slots, and a binding option for different suitable supports. Its 1/4-20 tool screw and 5/8-11 support connection serve different sides of the mounting arrangement. The angle-adjustable format is simpler than Huepar’s fine-height bracket and should not be mistaken for a precision elevator. That simpler arrangement can be useful for a nearby decorating mark or a tool kept on a small support. The trade-off appears when the beam needs tiny height corrections: moving the mounting point is a different experience from turning an elevator knob. Choose according to how often that final correction occurs in your work.
Pros
- Compact L-shaped format.
- Two magnetic fixing points.
- Hanging slots.
- Angle adjustment.
- 5/8-11 support interface.
Cons
- No fine-height elevator control identified.
- Instrument clearance and support suitability still require checking.
This adapter is the sensible endpoint when the support already establishes a useful height and only a compact attachment is missing. Its magnets, hanging slots, and angle adjustment cover that simpler role without pretending to provide a precision elevator. Repeatedly sliding the whole assembly to chase a horizontal mark is a good reason to move up to the PV12 instead. Where that fine correction is rarely needed, the basic L bracket can remain a useful, uncomplicated part of the setup.
To buy this product, click here.
Choosing the Best Laser Level Wall Mount
Identify the Missing Movement
A horizontal line below the mark needs height adjustment. A vertical reference pointing away needs rotation. Depth and sideways controls solve clearance and placement problems. Describe the correction you repeatedly struggle with, then choose a bracket that provides that movement directly. For cabinets and trim, holding a consistent datum during interior layout explains why a small correction needs to retain its relationship to the original mark.
Separate Tool and Support Threads
The male screw accepting the instrument may differ from the female thread under the bracket. Read both interfaces. Also check body clearance, window access, and the manufacturer’s supported instrument arrangement rather than judging compatibility from a single screw size.
Inspect the Actual Attachment Surface
Magnets need suitable steel. Clips need a sound edge within their permitted opening. Hanging holes need appropriate fasteners and substrate. Finished paint, thin ceiling components, and loose trim should not be assumed to provide a secure support merely because the bracket can reach them. The mounting guide covers matching the bracket to the surface and mounting interface, which are separate questions from how finely the bracket adjusts.
Check Adjustment Locks
A useful fine control should leave the tool stable after positioning. Tighten the intended locks without forcing them, allow the laser to settle, and verify the mark. A loose rotation or depth control can matter even when the height knob feels secure.
Account for the Complete Instrument
A matching thread does not establish capacity for a heavy or offset body. Compare the support instructions, instrument weight, center of mass, and physical clearance. Larger rotary equipment may need a documented wall platform rather than a compact line-laser bracket.
Choose Useful Accessories, Not Assumed Ones
A ceiling clip, mounting plate, or Lino adapter may be separate from the bracket listing. Check the named package. The most versatile photograph is not useful if the accessory that creates the required attachment is absent from the box.
FAQ
Will Every Mount Fit Every Laser?
No. Thread size, slide housings, body clearance, supported weight, and adapter requirements all matter. Match the exact instrument and mounting arrangement.
Does Fine Rotation Raise a Horizontal Line?
No. Rotation changes direction. Choose a mount with fine vertical adjustment if the required correction is beam height.
Can I Put a Magnetic Bracket Directly on Drywall?
Only if there is a suitable secure magnetic support arrangement. Ordinary drywall itself is not the steel surface the magnets require.
Is the RM10 a Generic Threaded Mount?
No. It uses a slide-in attachment for specified compatible Bosch housings, making the actual instrument model important.
Does the UAL130 Fit Any 1/4-20 Laser?
Do not assume so. Confirm the supported Leica Lino model and required adapter arrangement rather than using a generic thread description.
Why Recheck the Line After Tightening?
Locking or changing the bracket can move the tool. Let it settle and verify the reference against the intended mark before making permanent layout decisions.
Final Verdict
The Bosch BM1 is the strongest starting point when the recurring problem is putting a horizontal line at an exact working height. Its fine adjustment, lock, and alternative support positions give those tasks a coherent mounting system. The Huepar PV12 is a focused alternative for a compact compatible tool, while ENVENTOR becomes more relevant when depth and sideways movement are also needed.
A different adjustment calls for a different shortlist. The RM10 serves fine rotation on supported Bosch housings, the UAL130 belongs to a verified Lino arrangement, and the WM4 provides a sliding wall-platform role. Start with the movement and attachment surface, then confirm the instrument fit. That is how a bracket becomes a useful part of the layout rather than another adapter in the case.
