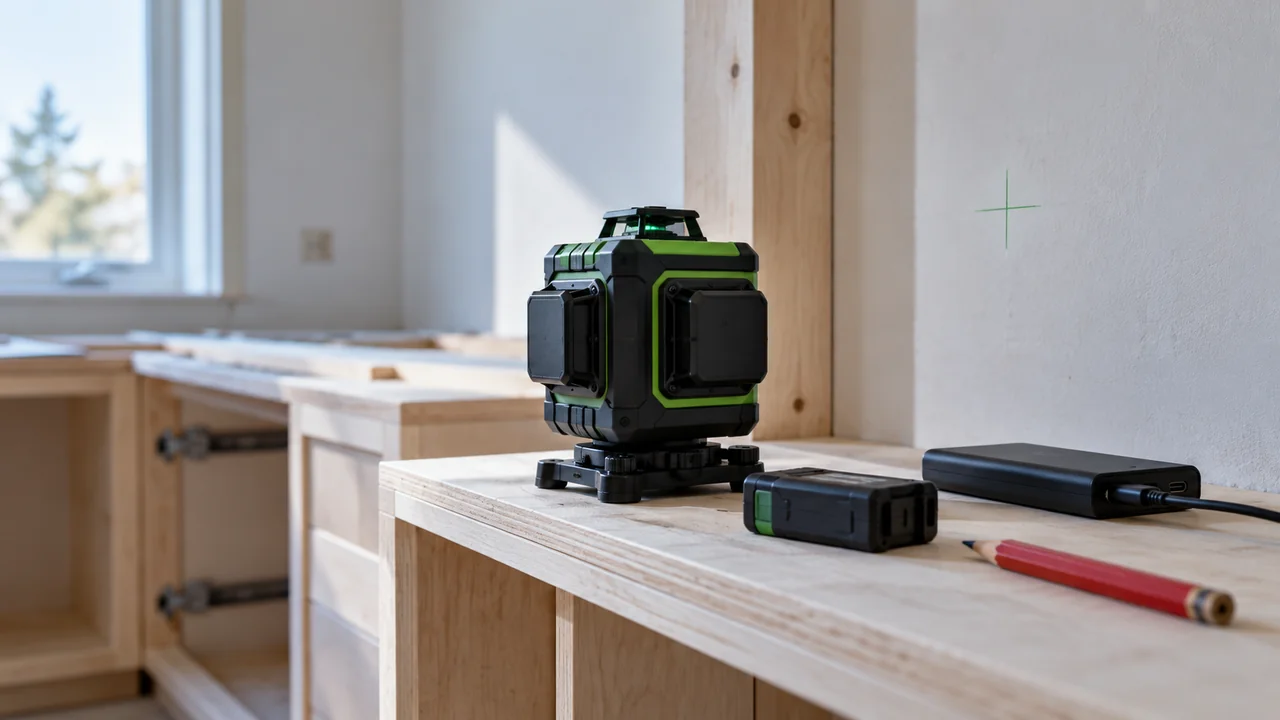
When two lasers both cover the room with three green planes, the useful difference may be the part you handle before the first mark. Huepar B03CG vs HM03CG is a good example: the B03CG arrangement uses a removable rechargeable battery, while the HM03CG centers on a built-in rechargeable design. That changes how you prepare, recharge, and recover from a flat battery.
The B03CG is the more flexible choice if removable power matters to you. The HM03CG is appealing when you want an integrated tool you charge between projects. Both can support three-plane interior layout, so start with the battery arrangement and mounting needs rather than assuming one extra label guarantees better lines.
B03CG: a removable-battery approach to room layout

The B03CG option linked here is the Pro-labeled Amazon package with a removable rechargeable battery. Check the complete selected package rather than assuming every listing called B03CG or B03CG Pro has identical supplied accessories. Its attraction is the ability to treat the battery as a separate part of preparation while retaining one horizontal and two vertical 360-degree references.
For a renovation that stretches across several working sessions, that flexibility can be more useful than another headline feature. A correctly matched spare pack can provide an alternative to waiting on a charge, and the supported direct-input arrangement gives another option when a safe supply is nearby. You still need to preserve the reference whenever handling the tool.
To buy this product, click here.
HM03CG: integrated charging without a separate pack routine

The HM03CG keeps the three-plane green layout but uses a built-in rechargeable arrangement. That suits a homeowner who finishes the room session, puts the instrument away to charge, and wants fewer loose power components to organize. A hard case and magnetic bracket make it straightforward to keep the core kit together between projects.
The tradeoff is how you recover when that charging routine is missed. You cannot plan a normal user battery swap in the same way as with a removable-pack design. If uninterrupted operation is important, decide how you will keep the instrument charged before you make its integrated simplicity the deciding benefit.
To buy this product, click here.
Huepar B03CG vs HM03CG: Battery and Mounting Differences
| Factor | B03CG option linked here | HM03CG | Why it matters |
|---|---|---|---|
| Core plane layout | 1 horizontal + 2 vertical 360° planes | 1 horizontal + 2 vertical 360° planes | Both support three-plane room references |
| Battery arrangement | Removable rechargeable battery | Built-in rechargeable battery | Changes spare-pack planning |
| Charging approach | Specified battery/tool USB-C arrangement | USB-C charging for the instrument | Prepare the correct components |
| Manual angled reference | Supported mode | Supported mode | An angled line is not automatically level |
| Mounting | Body and bracket interfaces must be checked | Body and bracket interfaces must be checked | Match the actual attachment point |
| Package identity | Amazon offer uses a Pro label | HM03CG package | Full labels and contents govern the selection |
Huepar’s B03CG power description and HM03CG configuration show why battery design deserves more attention than the shared 3D wording. The package linked above should still be matched by its full label and contents; a Pro Kit accessory bundle is not, by itself, evidence of a different optical instrument.
Removable power helps when the layout cannot wait for charging
Picture a cabinet installation with the reference already established and the next run ready to mark. If power runs low, a prepared compatible spare for the removable-battery setup gives you a route back to work. That is a real advantage when several tasks depend on the same instrument being available at the right moment.
The advantage depends on preparation. A spare you have not charged does not solve anything, and a pack that merely looks similar is not an approved substitute. Match the specified battery, connector, and charging equipment. Keep the contacts protected in transport instead of letting a loose pack share a pocket with screws or other metal items.
A change of battery can also disturb the instrument. Before handling it, preserve a visible datum on a stable surface. Afterward, let the laser settle and check that the reference returns to the mark. The purpose is to keep the work consistent, not simply to make the laser illuminate again.
For an occasional short project, this whole spare-pack routine may be unnecessary. If you charge the HM03CG before you start and use it for a localized layout, integrated power can be entirely comfortable. The difference is not that one kind of battery belongs to professionals and the other to beginners. It is whether your schedule benefits from separating the battery from the instrument.
Three planes solve coverage, not every layout decision
Both arrangements provide a horizontal plane around the instrument and two vertical planes. That can help when a shelving project continues onto an adjacent wall or when you need a vertical reference in more than one direction. A continuous plane reduces some repositioning, provided the line has a clear path to the surface.
The tool still needs to be oriented to the layout. Two perpendicular vertical planes do not automatically square a cabinet run to the correct wall or decide where a finished partition belongs. Choose the datum and the intended relationship first, then position the instrument so its references serve that plan.
Nor does a 360-degree description promise an unobstructed stripe everywhere. A stack of material, an open cabinet, or the body of a radiator can block the plane. Sometimes a higher support or a different location is more effective than turning on more lines. Planning that location before making the first mark helps avoid a restart halfway through the wall.
If cabinet work is the main reason for buying, our guide to using a laser level for cabinets explains how to carry a datum through the installation while accounting for the finished height. That practical method matters with either battery design.
Do not turn battery capacity into an accuracy or runtime ranking
A capacity figure tells you something about the battery, but it does not independently establish how long a particular layout will run. Voltage, active planes, brightness, temperature, and the condition of the pack all matter. A longer-looking headline runtime may describe a lighter operating load than the task you have in mind.
The same caution applies to precision. A model name or Pro label does not establish a tighter tolerance. Compare the stated accuracy for the actual selected instrument at the same distance and under the stated conditions. For a close cabinet datum, the required tolerance and the marking method should lead the decision, rather than the battery size.
This also helps avoid a disappointing upgrade. If your current challenge is a bracket that cannot place the reference at the required height, a larger battery does not address it. If the problem is losing the line on a very bright surface, a different charging arrangement does not establish better visibility. Tie the purchase to the constraint you are actually trying to remove.
Mount the instrument, not just the bracket
The body and bracket interfaces deserve separate attention. A tripod connection on the laser is not the same location as a connection on the supplied magnetic base. Check which part you intend to attach, then confirm the thread and the useful adjustment range. An adapter that fits the bracket may not belong directly on the instrument body.
For wall work, a suitable magnetic attachment can keep the floor clear. But the steel must be stable and the bracket must hold the instrument without movement. Thin trim, a loose access panel, or a surface someone will touch during the job is a poor place to preserve a datum.
For a freestanding setup, check the tripod’s usable height rather than only its maximum extension. An awkward low reference can be just as limiting as a ceiling mark. A steady support at the right position is more useful than a taller one that forces the laser into an obstructed line of sight.
Charging and package checks before the first project
| Check | B03CG arrangement | HM03CG arrangement |
|---|---|---|
| Before the job | Charge the correct removable pack | Charge the instrument |
| Reserve power plan | Prepare an approved compatible spare if needed | Plan the session and charging access |
| External supply | Use only the supported direct-input arrangement | Follow the instrument charging instructions |
| After handling the tool | Recheck the datum | Recheck the datum |
| Accessory assumptions | Verify the selected package | Verify the selected package |
The practical package question is what you will need on the first day. Check whether the chosen offer includes the expected battery, compatible charging components, bracket, and case. A base instrument, an accessory bundle, and a similarly named regional version should not be combined into one imaginary specification.
Outdoor use needs its own compatibility check. A pulse mode and a green beam do not mean every green-laser receiver will work. Confirm the receiver model and supported mode for the selected instrument, and do not assume a receiver is included because it appears in a bundle elsewhere.
Neither option should be stretched into every possible measuring job. If the main requirement is regular open-site elevation checking or a particular grade function, revisit the instrument type. For a wider comparison within the brand, see the Huepar laser-level buying guide.
Choose the preparation routine you will actually follow
| Your priority | More suitable direction | Reason |
|---|---|---|
| Prepare a separate spare before consecutive jobs | B03CG | Removable battery design supports that plan |
| Keep the kit integrated for occasional projects | HM03CG | Charge the instrument between uses |
| Use a supported external supply at a fixed station | B03CG arrangement | Confirm direct-input instructions and cable routing |
| Improve an awkward mounting position | Compare the supports first | Battery design does not solve placement |
| Find tighter precision for a demanding task | Check exact instrument ratings | Labels and capacity do not establish accuracy |
The battery distinction is useful because it describes a repeatable habit. Either charge the integrated instrument reliably between sessions, or prepare the correct removable pack and spare. There is no benefit in choosing a more flexible system if you will never use that flexibility, but there is a clear benefit when it removes an interruption from your work.
Which one makes more sense for your tool bag?
The B03CG arrangement is the more convincing fit when separate battery preparation matters. A removable pack suits repeated projects, spare-pack planning, and supported direct-input use where it can be arranged safely. Match the exact Pro-labeled offer and accessories, keep a reference check in the workflow, and the power flexibility becomes a useful part of the system.
To buy this product, click here.
The HM03CG fits a simpler charge-the-tool-and-go routine. For planned home projects, its integrated power arrangement keeps the kit straightforward while preserving the useful three-plane coverage. If you rarely need a mid-session power change, you can concentrate on mounting and marking rather than organizing additional packs. That is a legitimate reason to prefer it, not a compromise that needs dressing up.
To buy this product, click here.
